After the content item has been initiated, the drafting process can begin. Drafting content is a hybrid process: some tasks occur within Content Hub Ops and some tasks occur offline (in Microsoft Word or other software, depending on the end product type). All work is coordinated through Content Hub Ops to ensure a single source of truth related to production phase, taxonomy and metadata, and publication timeline.
Step One: Confirm Foundational Settings
Prior to drafting content, it is important to confirm the initial settings for the content item.
- Log in to Content Hub.
- Locate the initiated content item using Calendar, Work or Search, and open the content item details page.
- If the draft creation process is starting immediately after initiating the content, the user will already be on the content item details page. This is the default view after adding a content item to the system.
- To open a content item from Calendar: Click Content in the navigation and choose Calendar from the menu. Navigate to the correct date and double click on the content item card to open the content item details page.
- To open a content item from Work: Click Content in the navigation and choose Work from the menu. Locate the content item in the list and click on the content item name to open the content item details page.
- To open a content item from Search: Click Content in the navigation and choose Search from the menu. Use search text and filters to locate the item. Click on the content item card to open the content item details page.
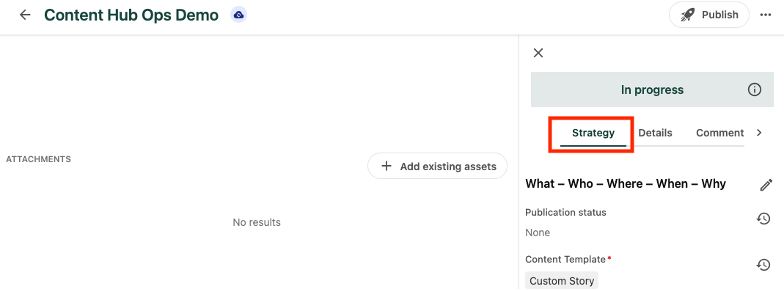
- On the content item details page, select the Strategy tab in the right-side panel. (See Fig. 1)
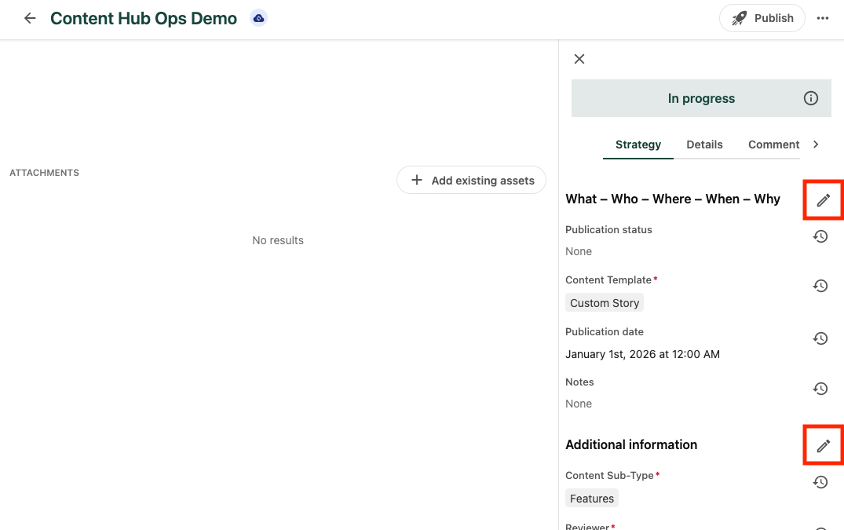
- Confirm the following fields have been filled in accurately. To edit a field, click the pencil icon next to the appropriate section heading (i.e., “What-Who-Where-When-Why” or “Additional Information”), make the necessary changes, click Save on the pop-up panel for the field being edited and click Save at the top of the section in the side panel. (See Fig. 2)
- Content Template
- Publication Date – This is the planned publication date. It can be changed later.
- Notes (optional) – These are internal notes to other system users.
- Content Sub-Type*
- Primary Topic
- Primary Strategy
- Primary Audience
- Depending on the selected Content Sub-Type, there may be a “Brief assets” section at the bottom of the Strategy tab of the right-side panel. Users can upload a creative brief or other files here that are relevant to the project. Click the “+ Add” button to add an asset.
Note: Creative assets to be used in the content item, such as a photo, should not be uploaded under the “Brief assets” section. Creative assets should be uploaded to the Content Hub DAM, following proper procedures. Creative assets can be attached to a content item following the proper upload in the DAM. See the DAM documentation for additional information.
Step Two: Start Drafting
Now the user is ready to officially start the draft process. The system moves the content item into the “Draft” state and the interface changes to include a Submit button in the top right corner. In this draft state, the content author can begin working on the draft content.
Note: Depending on the selected content sub-type, the interface may vary slightly.
- Click the Start drafting button at the top right corner of the content item details page, then continue to “Step Three: Upload Draft,” below.

Step Three: Upload Draft
Content authors are expected to begin drafting text-based content using a shared Microsoft Word document. This allows for easier collaboration, tracking changes and feedback sharing in the early writing phase, especially when requiring external collaboration with, for instance, college professors or researchers who don’t have access to the Content Hub internal authoring and collaboration experience.
- Upload the Word document into the “++Content Hub” folder in the UCAM SharePoint General channel (accessible via Teams or SharePoint on the web). Adding documents to this file ensures that all UCAM staff have permission to view and edit the document.
Note: Users may opt to save the file to another location. If this is the case, the user assumes responsibility for granting access to other users who will need file access (e.g., reviewers).
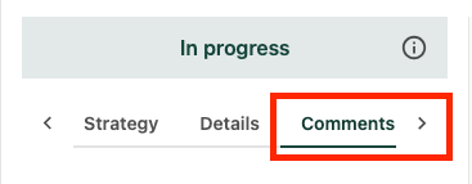
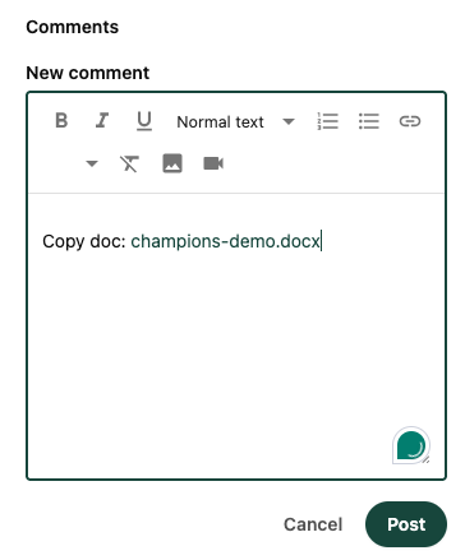
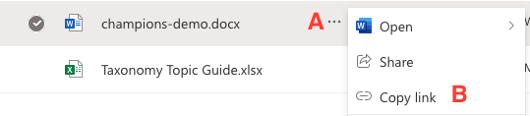
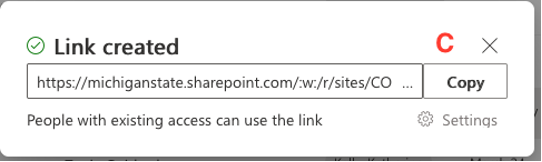
- Copy and paste the shared link of the Word file in the Comments tab of the content item details page and click Post to save the comment. See Fig. 4 and Fig. 5. For instructions on locating the shared link, see Fig. 6 and Fig. 7.
Step Four: Assign Reviewer and Submit
The content author must designate a Reviewer for the content. This ensures the correct person will be notified when the draft is sent for review in the next step of the workflow.
- Click on the Strategy tab in the right-side panel. (See Fig. 1)
- Scroll to the “Additional information” section and click the pencil icon to edit these settings.
- Click the “+” icon in the “Reviewer” field.
- Check the box next to the appropriate name.
- Click Save in the pop-up window to add the Reviewer.
- Click Save next to the “Additional information” section header to save the changes.
- Click the Send draft for review or Submit button at the top right corner of the content details page to submit the content item for review. (The button text will vary depending on the content sub-type.) Click Confirm on the pop-up confirmation window, if one appears.


This advances the content to the next workflow state, transitioning responsibility to the Reviewer. The Reviewer will receive an email notification that they have been assigned a content item for review.
Note: Campus Story content should be loaded prior to submitting for review. See "Load Text" for information on how to load content into the story template.
Photo Gallery content will skip the Review state and go straight to editing. The submission button for these stories reads "Send to edit."
Statement content will skip from Content Development to Prepare to Publish. Content should be loaded, edited and have the taxonomy validated before clickin the "Finalize" button.
*Note: If the Content Sub-Type needs to be changed, delete this content item and create a new content item with the correct settings.