All content items must first be initiated in Content Hub Ops. Initiating the content adds the content items to the calendar, assigns the content to a workflow and content template, and documents various metadata and taxonomy elements used in reporting. Content items can be initiated from the Calendar, Work and Search pages.
Initiate Content from Calendar Page
To initiate a content item from the Calendar page:
- Log in to Content Hub.
- Click Content on the main navigation and choose Calendar.
- (Optional) Adjust the displayed Calendar view to show Day, Week, Work Week, Month or Agenda view.
- Double click on a date to add a content item to that specific date. Alternatively, click the “+ Content” button in the upper right corner. (See Fig. 1)

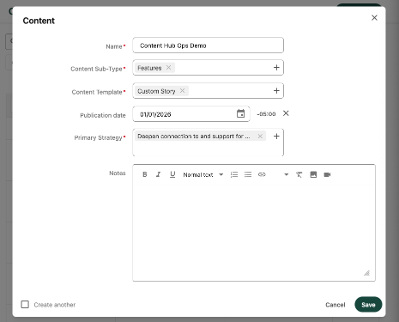
- Fill in the necessary content item fields and click Save on each pop-up window to close. See “Content Fields,” below. (See Fig. 2)
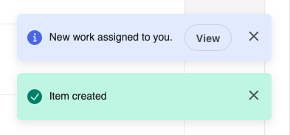
- Click Save. This creates the content item, puts it in the “In Progress” state, assigns the work to the initiating user and add the item to the calendar on the publishing date. Click on the item to open the content details page for the user to continue working on the item.
Continue to step two: Content Development
Initiate Content from Work Page
To initiate a content item from the Work page:
- Log in to Content Hub
- Click Content on the main navigation and choose Work.
- Click the “+ Content” button in the upper right corner.

- Fill in the necessary content item fields and click Save on each pop-up window to close. See “Content Fields,” below. (See Fig. 2)
- Click Save. This creates the content item, puts it in the “In Progress” state, assigns the work to the initiating user and opens the content details page for the user to continue working on the item. (See Fig. 3)
Continue to step two: Content Development
Initiate Content from Search Page
To initiate a content item from the Search page:
- Log in to Content Hub.
- Click Content on the main navigation and choose Search.
- Click the “+ Content” button in the upper right corner.

- Fill in the necessary content item fields and click Save on each pop-up window to close. See “Content Fields,” below. (See Fig. 2)
- Click Save. This creates the content item, puts it in the “In Progress” state, assigns the work to the initiating user and opens the content details page for the user to continue working on the item. (See Fig. 3)
Continue to step two: Content Development
Content Fields
The following fields are needed to create a content item:
- Name
- This is an internal working title.
- It is used to construct the URL for MSUToday stories, following this link construct: msutoday.msu.edu/news/yyyy/mm/name.
- Example:
- Name: Highest grades report for 2025
- Publication date: 05/09/2025
- MSUToday URL: https://msutoday.msu.edu/news/2025/05/highest-grades-report-for-2025
- Content Sub-Type
- This is a sub categorization of content.
- The Content Sub-Type selection controls what Content Templates are available for use. Always choose the Content Sub-Type before choosing a Content Template.
- The Content Sub-Type also controls the workflow the content item progresses through to publication.
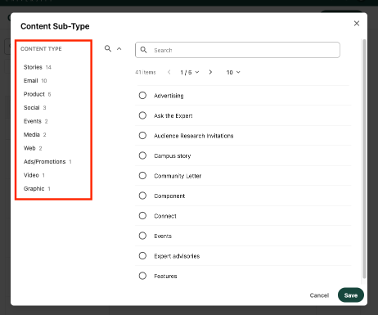
Tip: Use the Content Type filters on the left to narrow down the list of available Content Sub-Types. Note the pagination of the list of options, as there may be additional options that do not display on first load.

- Content Template
- This controls the available data fields and the layout for the content item.
- Publication Date
- This is the date that the item is anticipated to launch.
- If the content item was created by double clicking on the Calendar, this date will be pre-populated with that date. The date can be changed.
- Primary Strategy
- This is a required value aligning to the University Communications and Marketing strategic plan pillars.
- Choose the single strategy that best fits the intent of this content item.
Note: The Name of an MSUToday story item becomes the URL. Keep URL best practices in mind when naming the item. The Name can be changed up until the content is prepared for publishing.