Asset Creation Best Practices
Following these best practices can help ensure timely approval of created assets:
- Ensure your Title and Description fields have relevant information about your asset. Both the Title and Description fields are used in various places throughout Content Hub. They also inform search results when users search for keywords within the Assets page. For assets created by the Visuals group, the Title will be the same as the File Name. These Titles can be left as is.
- Keywords are automatically pulled from the asset metadata. You can also add additional keywords for terms not covered by other taxonomy fields. If listing multiple keywords, separate them with commas.
- Upload assets in the original format and size they were created. Content Hub can create smaller sizes and convert to different file types, but upsizing is a challenge.
Creating Assets
Users with asset creation rights can create new assets on the Create page within Content Hub. See the "DAM User Roles" page for more information. Expand the tab below for instructions.
- Log in to Content Hub.
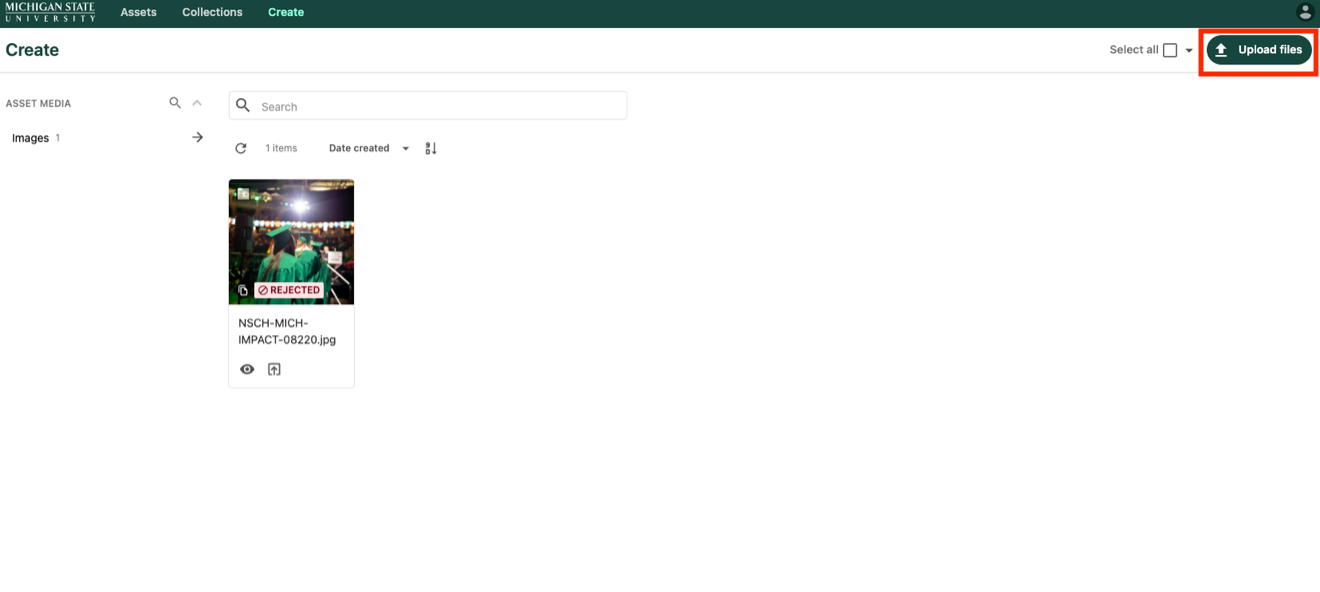
- Click the Create tab.
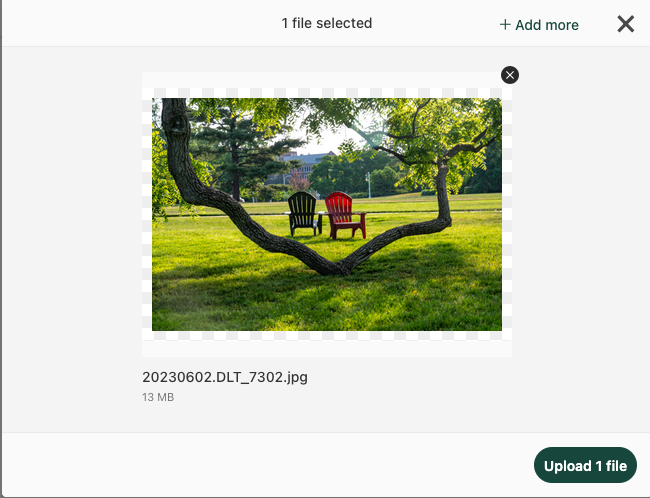
- Click the Upload files button at the top right corner of the page. An upload files screen will appear.
- Choose to upload a file from the device or from an import link. Users may use the file selection tool to select a file or drag and drop files onto the interface. Multiple files can be selected.
- Click Upload file button.
- While the asset upload processes, edit metadata and taxonomy, as needed. See “Editing Asset Metadata,” below.
- Once metadata is complete, submit for approval. See "Asset Workflow" for more information.
Editing Asset Metadata
After an asset has been uploaded, the asset’s metadata, including the taxonomy tags, can be updated. Metadata should be updated and completed as much as possible upon uploading. It also can be edited later, as needed.
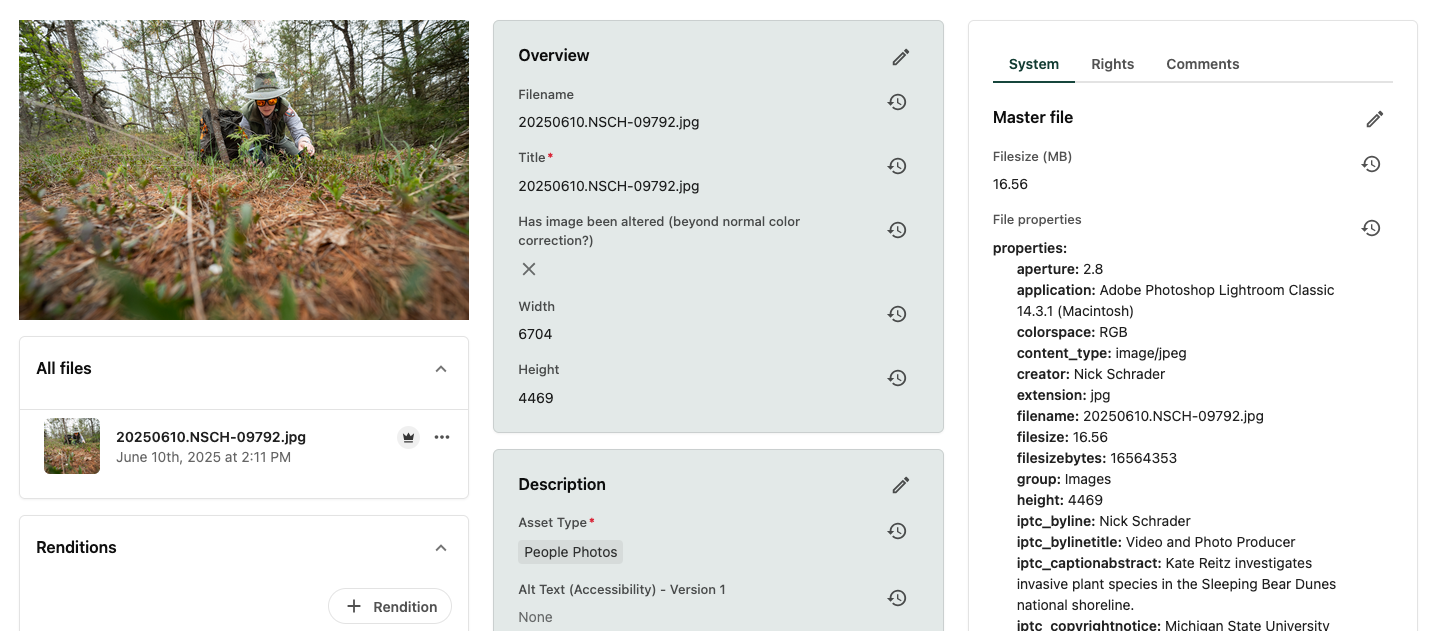
- If one asset was uploaded, the system will display the Asset Details page. If multiple assets were uploaded at once, click on an asset’s thumbnail image on the Create screen. This opens the Asset Details page.
- Click a pencil (edit) icon in any of the metadata panels within the center column of the Asset Details page to edit the metadata fields within that panel.
- Edit all fields necessary in the panel. Editable fields will have a white background.
- Click Save at the top right corner of the panel to save changes.
- Repeat for other metadata panels.
- Navigate to the Assets page in Content Hub and locate the asset.
- Click on an asset’s thumbnail image on the Asset page. This opens the Asset Details page.
- Click a pencil (edit) icon in any of the metadata panels within the center column of the asset details page to edit the metadata fields within that panel.
- Edit all fields necessary in the panel.
- Click the Save button at the top right corner of the panel to save changes. Other panels cannot be edited until the panel currently in edit mode has been saved.
- Repeat for other metadata panels, as needed.
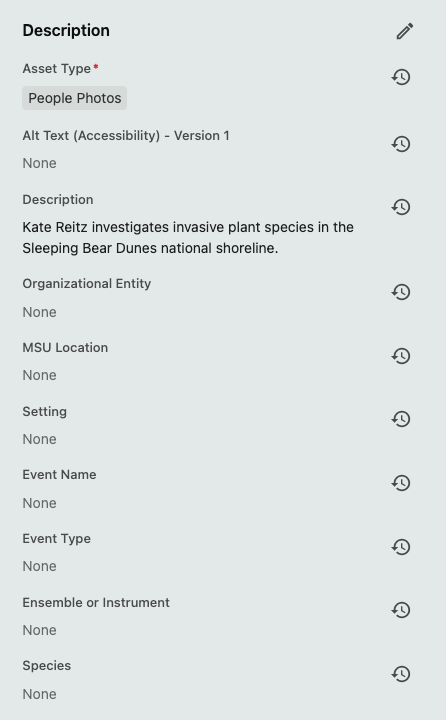
Types of Metadata Fields
There are three kinds of metadata fields in the center column of the Asset Details page:
- Taxonomy fields
- Taxonomy fields enable users to select options from a predefined taxonomy list. This controls keyword terminology, prevents misspellings and ensures that tags are mapped to appropriate filters to enhance search capabilities.
- Taxonomy fields are denoted by a “+” button to the right of the field.
- To add preset values to these fields, click the “+” button and select a taxonomy item from the list.
- Some taxonomy fields allow for multiple values. In these cases, choose all tags that are relevant within that field.
- Some taxonomy values have child items. These can be accessed by clicking the right arrow icon at the far right of a taxonomy value.
Selecting a child value will automatically associate the asset with the parent value for search results. For example, an asset tagged with the child value “Department of English” under the parent value “College of Arts and Letters” in the Organizational Entities field would appear in search results filtered by either “Department of English” OR “College of Arts and Letters.” The same image tagged only to the parent value “College of Arts and Letters” would not appear in search results filtered to “Department of English.” Users should always tag at the lowest possible child level that pertains to the asset.
- Free text fields
- Free text fields allow the user to enter text, such as a description, alt text or general keywords. If a field has a text character limitation, it will be noted with help text.
- Boolean fields
- Boolean fields require either a “Yes” (a checked box) or “No” (unchecked box).
For a full guide to the various metadata fields in MSU’s Content Hub DAM, see the "Metadata and Taxonomy" page.
Asset Card Icons
Once an asset is in the system, it will appear as an asset card on the Assets page, Create page (before the asset is submitted for approval), and on the user’s home page (reached by clicking the MSU wordmark). A user’s role determines the operations available as icons below the asset thumbnail on the asset card.
Available operations, by user role, include:
- Asset Creator or Editor
- Inline Preview (eye icon) — This operation allows for a quick view of the asset at a larger size, without clicking away to the Asset Details page.
- Submit for Approval (arrow icon) — This will submit an asset for approval. Please see the Asset Approval section for more information about how this process works.
- Asset Admin — Asset Admins will see all the above options, plus:
- Delete (trash icon) — This deletes the asset from the DAM.
- Direct publish (rocket ship icon) — This will bypass the Asset Approval workflow and directly publish the asset into the DAM.
Users also may see the following status indications on an asset card:
- Approved: “Approved” (in green text) appears on the asset card when the asset has completed the approval workflow successfully.
- Under Review: “Under Review” (in brown text) appears on the asset card when the asset has been submitted for review but has not yet been approved or rejected.
- Rejected: “Rejected” (in red text) appears on the asset card when the asset submission has been rejected. The user must make necessary changes (e.g., correct taxonomy errors) to resubmit for the asset approval workflow.
- Duplicates exist (two boxes icon): When the duplicates exist icon appears, a duplicate of this asset may already exist in the DAM. Use the asset search functionality to determine if this asset already exists. Do not submit a duplicate for approval; delete the duplicate upload. Use public links to create a different image size rendition from the original asset, if needed.
Documentation updated: June 15, 2026
Is there an issue with this documentation? Report it here.
Note: Uploaded assets appear as card items on the Create page. Assets enter Content Hub in the “Created” workflow state. They are only visible to the user that initially uploaded the asset file. Content Hub can take from 10 to 45 seconds to process the image and renderings. The thumbnail will be blank while processing completes.