Media Library is used to store image and asset files, such as PDFs, for later use in Content Editor and Experience Editor.
To access Media Library:
- From Launchpad: Click Media Library on the menu.
- From Content Editor: Click Media Library at the bottom of the Content Tree in the left pane of the page.
- Components that allow media files can also be used to access the Media Library. Instructions will vary by component. See examples in “Searching for Media Files,” below.
Working With Files
Uploading Media
All media on a website must be stored in the Media Library in the appropriate folder. This protects the assets, as only Sitecore users with access to the website will have access to the assets. If an asset was stored outside of the website’s folder structure, other users would be able to edit or delete the file.
- Document files (e.g., PDF, DOCX, PPT): Media Library > Assets > sitename > Docs
- Images and graphics files (all types): Media Library > Assets > sitename > Images
- Video files: Media Library > Assets > sitename > Videos
All websites can use the global media files in Media Library > Assets > Global.
All images should be web-ready. Compress files to reduce their size and improve site load times. Recommended image sizes are provided for components in the Images section.
When multiple sizes and resolutions of the same image are required, users should create all image versions at the same time. File creation is easier while you have the original image available. The files will be named similarly and stored in the same folder or subfolder. For example, a content author may want to provide a low-resolution image to be displayed in a rich text component with a link to download a high-resolution version of the image.
Naming Conventions
Requirements:
- Use lowercase letters, no spaces.
- Use hyphens to separate words. (Underscore is acceptable, but not preferred.)
- Avoid special characters.
Best practices:
- Incorporate words that you may want to search with when locating images later.
- Example: covid-19-hand-washing (can search on “covid,” “covid 19” and “hand washing”)
- Indicate the image’s purpose by including “hero,” “thumbnail,” “video,” etc. at the end of the name.
- Examples: admin-building-hero, grad-school-thumbnail
- Indicate the image’s size/shape by including “small,” “tall,” “square” or other descriptive word at the end of the name.
- Examples: beaumont-tower-tall, sparty-status-square
Folders
- Use folders to group images for better organization and simplified locating.
- Name folders using lowercase letters and no spaces.
Best practices:
- Use folders to group related images, such as for a major section of a website (e.g., a main navigation item and its pages), one story page (e.g., a page that may have several images), a photo gallery or a section of related content (e.g., staff directory).
- When practical, first create a folder to store related items, then upload the image to this folder. This provides better organization of assets.
Searching for Media Files
The appearance of the Media Library and the availability of search functionality changes depending on how the Media Library is accessed. View the tabs below for more information.
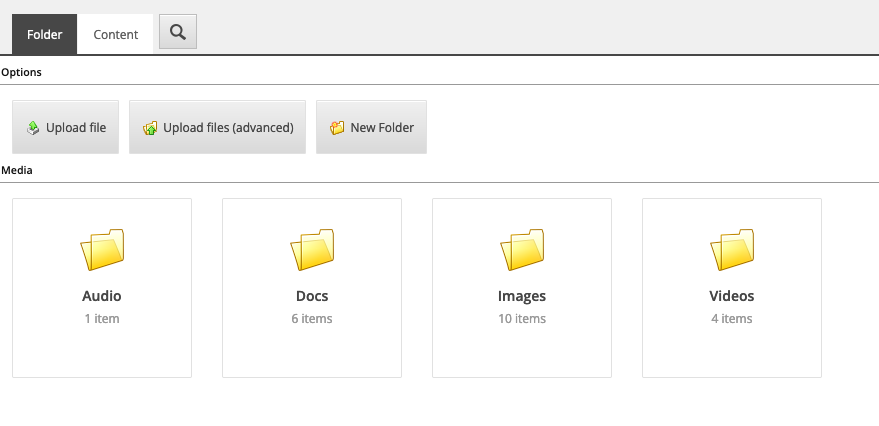
Access Folder Tab From the Launchpad
Click a folder to expand and view its contents.

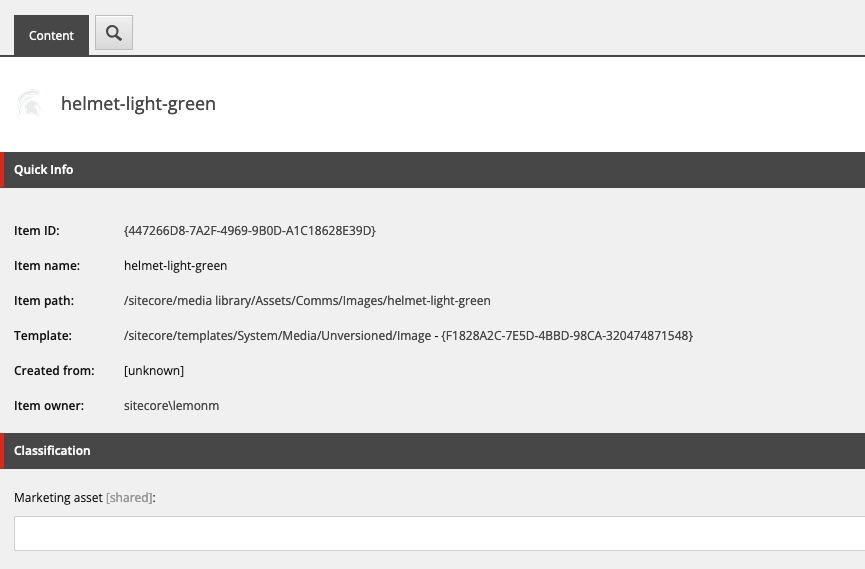
Access Content Tab From the Launchpad
After selecting an image from the Content Tree, detailed information about the image will be displayed in the Content tab.
When a media file is selected, the navigation ribbon indicates the actions that can be performed, such as view, edit (in Image Editor), download (save to your computer) or upload.
The image properties can be edited in the Content tab. For example, add alt text that is used every time the image is placed in a component.

Search From the Launchpad
The initial screen when navigating to Media Library will load the Search mode with all files selected.
Searching for a file requires the full and exact file name to find a match. The search treats hyphenated text as two separate searches. For example, a search on “test” will return files with item names test, test-1 and test-for-errors. However, it will not return Item names testers or testcase.
Use the asterisk as a wildcard to represent any number of search characters, following these guidelines:
- Use quotation marks for an exact match. Example: typing “MI” returns item names that include exactly “MI” or start with “MI“ followed by any characters.
- Use an asterisk at the end to allow following characters. Example: typing “MI*” returns item names that start “MI” followed by any characters.
- Use an asterisk at the start to allow preceding characters. Example: typing “*MI” returns item names that end in “MI” preceded by any characters.
- Use asterisks before and after characters. Example: typing “*MI*” returns item names that contain “MI” anywhere in the name.
Click the drop-down arrow to the left of the Search field to open a list of predefined search options (e.g., most recently modified items, most recently created items, search filters or search operators).
Searches are iterative. After a search, the next search operates on the previous search results.
Users may choose from several view types: List, Grid, Media or Image view.
An image is added in the Content field.

- Click Show Editor.
- Position the cursor where the image should be placed.
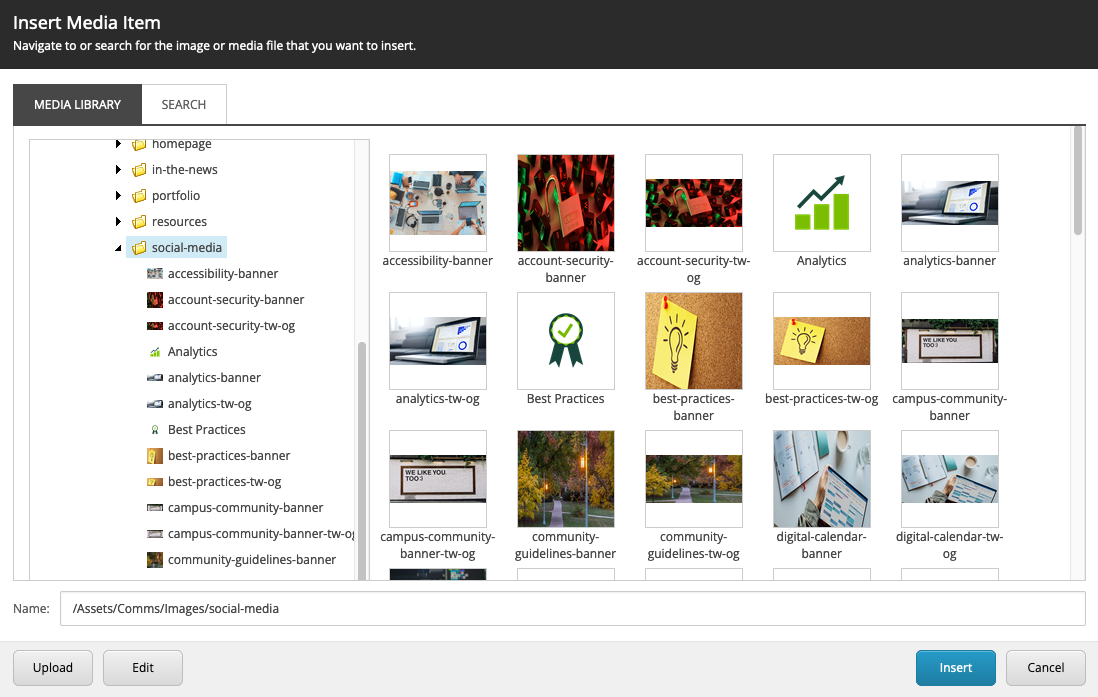
- Click Insert Image in the rich text editor toolbar to open the Media Library.
- Find an image. In the List view, use the Content Tree to locate an image. Click the Search tab to look up an image using the same process as the Search icon, above.

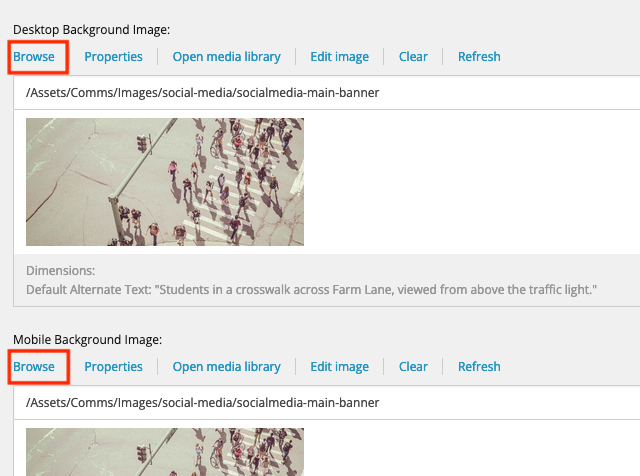
An image is added in the Desktop Background Image field.

Click Browse to open the Media Library. Use the following tools to locate and select an image file.
- Predefined Search options — left vertical menu
- Filters — dimension ranges, media type
- Search — enter search criteria
- View mode — List view (shown below) or Tree view (i.e., Content Tree)
Documentation updated: June 17, 2024