Add System User
To create a system user:
- Log in to Content Hub.
- Click the gear icon (“Manage”).
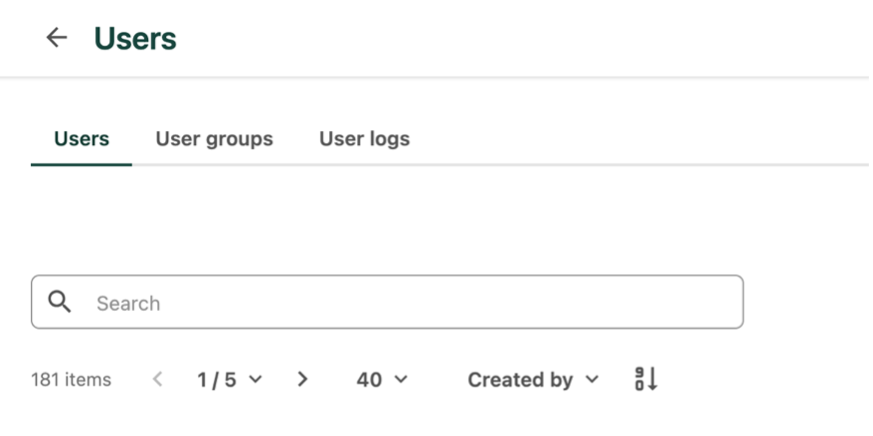
- Click Users tile.
- On the Users tab, search for the user to confirm they're not already in the system. Once confirmed, click the "+ User" button.
- Enter the user's MSU email address in the User Name field.
- Click the "+" icon next to Modules to open the modules assignment window.
- Click the checkbox next to any module the user will need to access. and click Save.
- Click Save to close the user window.
Grant User Permissions
To add a user to a user group and grant them permissions:
- Log in to Content Hub.
- Click the gear icon (“Manage”).
- Click Users tile.
- On the Users tab, search for the user. Alternatively, type the email address for their account in the Search bar.
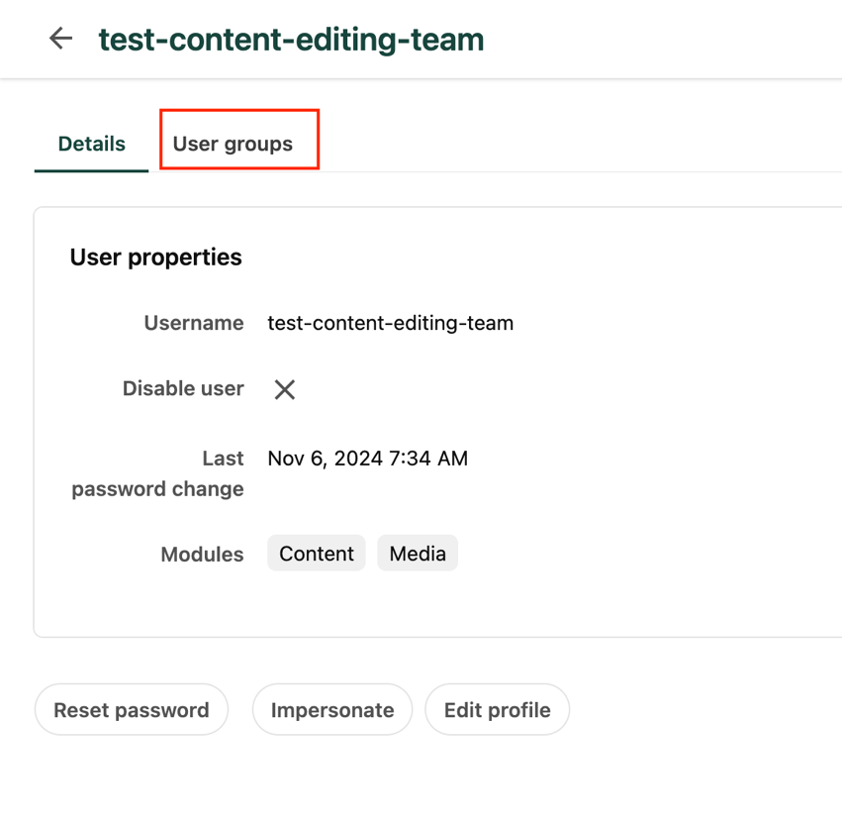
- Click the “i” icon (“View Details”) to the right of the user name to open the user profile settings.

- Click on the “User groups” tab.
7. Under “Group memberships” on the left side of the screen, click “Add to user group.”
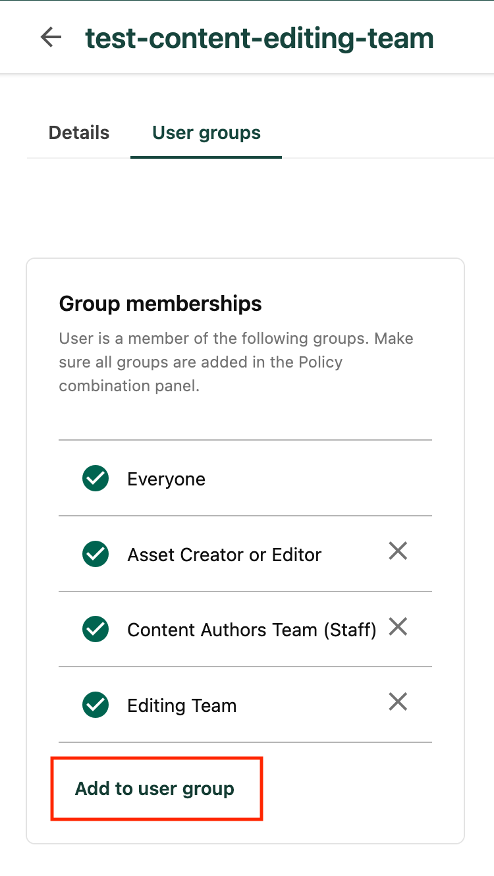
8. Search through the group options or use the Search box to type a group name.
9. Check the box next to the group name and click the Select button.
10. Under “Policy combination” on the right side of the screen, click “Add item.” The system should add an item matching the name of the newly added user group to the list of selected policies.

11. Repeat as necessary for other groups.
12. Click Save.
Documentation updated: June 19, 2025
Is there an issue with this documentation? Report it here.