Jump to HeaderJump to Main ContentJump to Footer
Michigan State University
Digital Experience Studio

University Communications and Marketing

Digital Experience Studio

  • Experience Program
    • Website Project Process
    • Working with a Vendor
    • Glossary
    • Taxonomy Data Dictionary
  • |
  • Experience Design
    • Website Strategy
    • Website Structure
    • Information Architecture and Navigation
    • User-Centered Design Conventions
    • Common UX Issues
    • Enterprise Design System
    • Content Planning
    • Creating Accessible Content
    • Taxonomy and Filters
  • |
  • Website Technology
    • Web Standards
    • Search Engine Optimization
    • Cascade CMS
    • Sitecore CMS
    • Content Hub Basics
    • Content Hub DAM
    • Content Hub Operations

    SitecoreAI

    Sitecore user login
  • |
  • Social Media
    • Alt Text Bookmarklet
    • Meta Ad Pixel
    • Social Media and Web Integration
    • Sprinklr

    Sprinklr

    Sprinklr user login
  • |
  • Analytics
    • Google Analytics (GA4)
    • Testing
    • Data Visualization

    Google Analytics

    Google Analytics user login
  • |
  • News and Events
    • News and Updates
    • Events and Trainings
Digital Experience Studio

University Communications and Marketing

  • Experience Program
  • Experience Design
  • Website Technology
  • Social Media
  • Analytics
  • News and Events

< Experience Program

  • Website Project Process
  • Working with a Vendor
  • Glossary
  • Taxonomy Data Dictionary

< Experience Design

  • Website Strategy
  • Website Structure
  • Information Architecture and Navigation
  • User-Centered Design Conventions
  • Common UX Issues
  • Enterprise Design System
  • Content Planning
  • Creating Accessible Content
  • Taxonomy and Filters

< Website Technology

  • Web Standards
  • Search Engine Optimization
  • Cascade CMS
  • Sitecore CMS
  • Content Hub Basics
  • Content Hub DAM
  • Content Hub Operations

SitecoreAI

Sitecore user login

< Social Media

  • Alt Text Bookmarklet
  • Meta Ad Pixel
  • Social Media and Web Integration
  • Sprinklr

Sprinklr

Sprinklr user login

< Analytics

  • Google Analytics (GA4)
  • Testing
  • Data Visualization

Google Analytics

Google Analytics user login

< News and Events

  • News and Updates
  • Events and Trainings
Digital Experience Studio > Website Technology > Content Hub DAM >

Restrict Asset Visibility

MSU Tools and Resources

  • A to Z Index
  • Find People
  • Email
  • Tech Support
  • Social Media Directory

Communications Resources

  • University Communications and Marketing
  • University Trademarks and Licensing
  • MSU Brand Studio
  • MSU Editorial Style Guide
  • MSU Photos

Contact us

517-355-7505

Address

Michigan State University 408 West Circle Drive East Lansing, MI 48824

Follow Us

  • Visit our Facebook page
  • Visit our page on X
  • Visit our Instagram page
  • Visit our LinkedIn page
  • Visit our YouTube page
  • Visit our TikTok page

If you're having accessibility issues, please let us know.

Know MoreTransparency Reporting: Budget & Salary/Compensation
  • Contact Information|
  • Site Map|
  • Privacy Statement|
  • Site Accessibility|
  • Call MSU: (517) 355-1855|
  • Visit: msu.edu|
  • Notice of Nondiscrimination|

SPARTANS WILL|© Michigan State University|

Restrict Asset Visibility

There may be instances where a user needs to restrict the visibility of sensitive assets. For example, assets required for some executive communications may need to be restricted to the group of staff working on these channels. 

How Restricted Visibility Works

  • Assets with restricted visibility are only viewable by Asset Admins and users of selected functional user groups.
  • Asset visibility can be restricted while the asset is in any state: Created, Under Review or Approved.
  • By default, all assets begin with the field “Restricted Visibility?” value set to “No.” This ensures permissions are correctly processed by Content Hub. If assets are imported or otherwise processed by Content Hub without this field being set to “No”, it may cause visibility issues.

Instructions for Restricting Visibility

Restricted visibility settings are controlled by Asset Admins. To restrict an asset:

  1. Log in to Content Hub and click the Assets tab.
  2. Locate and click the asset to open its Asset Details page.
  3. Navigate to the Restricted Visibility metadata panel in the center column of the Asset Details page.
  4. Click on the pencil (edit) icon to enabling editing of the Restricted Visibility panel settings.
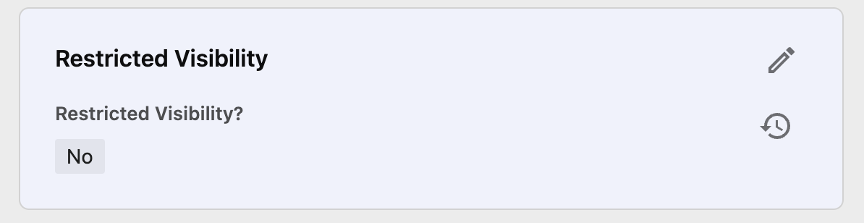
Screenshot showing the restricted visibility setting field
Fig. 1: The Restricted Visibility panel prior to activating the edit functionality. By default, the setting is set to “No.”
  1. Click the “+” icon to the right of the Restricted Visibility? field to edit the field.
  2. Select Yes from the taxonomy list.
  3. Click Save to close the field editing options. A new field, “Functional Group,” appears. 
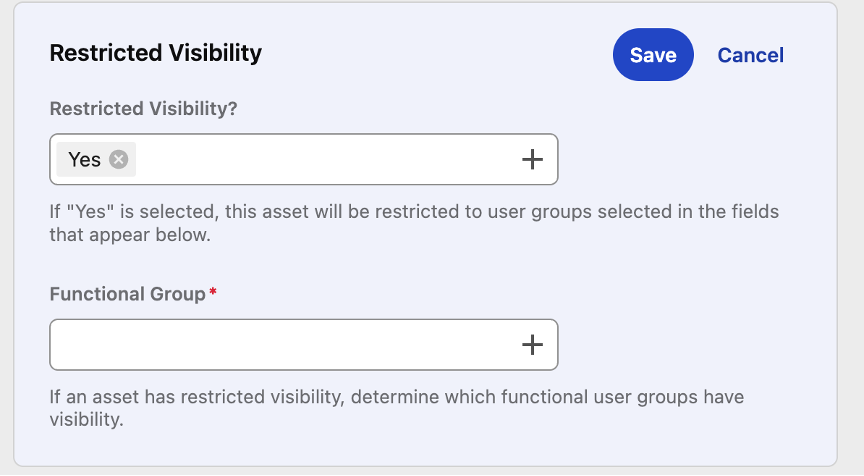
Screenshot showing the restricted visibility field edited to
Fig. 2: The Functional Group field appears after the Restricted Visibility? field is set to “Yes.”
  1. Click the “+” icon to the right of the Functional Group field to edit the field.
  2. Select the functional group(s) that should be able to see the asset from the taxonomy list. This is a required field when restricted visibility is enabled.
  3. Click Yes to close the field editing options.
  4. Click the Save button at the top right corner of the panel to save the changes to the visibility restrictions. 

Within a few moments, the asset will enter a new state flow called Restricted Visibility. In this state flow, only Asset Admins and user groups associated with the selected functional group(s) will be able to see the asset. 

Unrestricting an Asset

Within the Restricted Visibility state flow, a member of a user group able view the asset can select the “Request to Unrestrict Visibility” button at the top right corner of the Asset Details page. By doing so, the user indicates that the asset can be unrestricted. An email is sent to all Asset Admins requesting them to remove restrictions in the visibility settings for the asset.
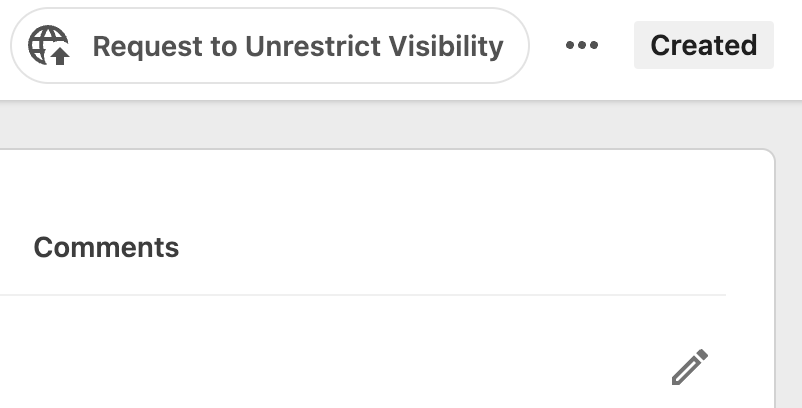
Screenshot showing the
Fig. 3: The “Request to Unrestrict Visibility” button is visible to users who can view an asset with restricted visibility controls.

To remove the visibility restrictions, the Asset Admin should:

  1. Locate and click the asset to open its Asset Details page.
  2. Navigate to the Restricted Visibility metadata panel in the center column of the Asset Details page.
  3. Click on the pencil (edit) icon to enable editing of the Restricted Visibility panel settings.
  4. Click the “+” icon to the right of the Restricted Visibility? field to edit the field.
  5. Select No from the taxonomy list.
  6. Click the “+” icon to the right of the Functional Group field to edit the field.
  7. Remove all groups from this field.
  8. Click Save to close the field editing options.

The asset is now visible to all users who would normally be able to view the asset based on its lifecycle stage (e.g., Created, Under Review, Approved).


Documentation updated: Sept. 22, 2026

Is there an issue with this documentation? Report it here.